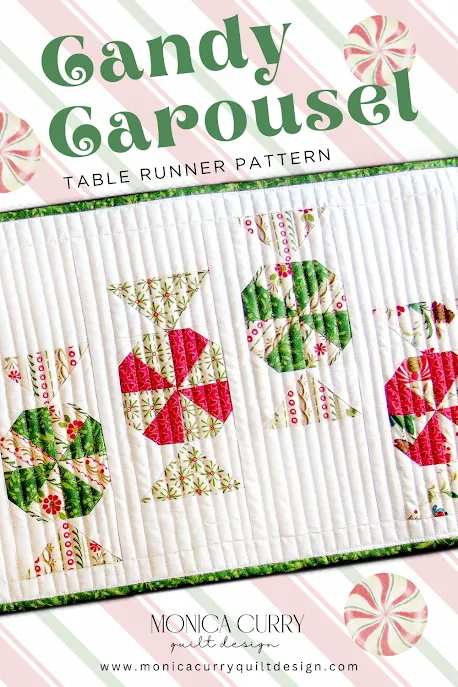
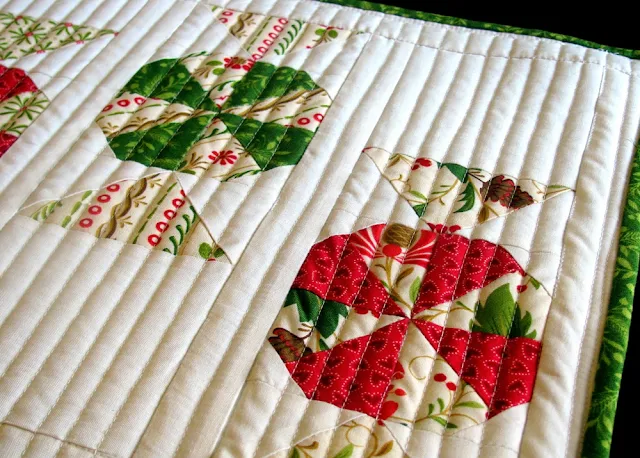
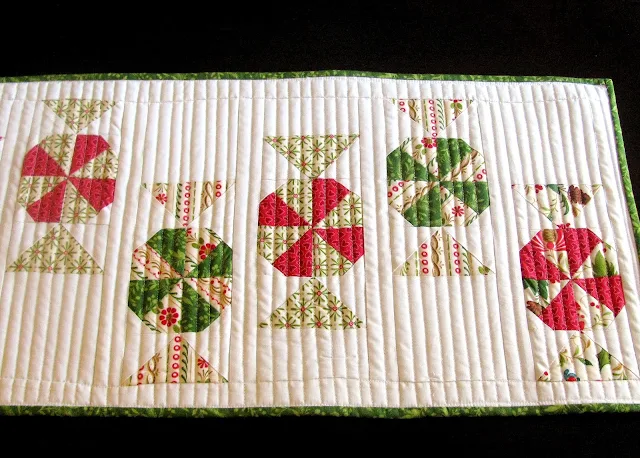
My newest pattern, Candy Carousel, was inspired by Christmas peppermint candies. This table runner pattern is simple and modern. It would make an excellent project for the confident beginner. Pattern includes instructions for making quick pinwheel blocks.
How to Raise Your Cutting Table to Reduce Back Strain

HOW TO RAISE YOUR CUTTING TABLE TO REDUCE BACK STRAIN (Updated July 5, 2018)
When I worked as a graphic designer, I sat for long hours at the computer. It was easy to get lost in my work and not pay attention to my body. I paid the price, however, because this caused me to suffer from back pain for years. So, when I started quilting more, it became clear that I needed an ergonomically friendly cutting table. There were several options available to me, but I opted to buy the Linnmon/Finvard table from Ikea. This Ikea table height can be adjusted to several heights with a "peg-in-the-hole system." This table was a great buy, but there are other ways to get a raised table without putting out a lot of cash.
FIND THE CORRECT TABLE HEIGHT FOR YOU
Measure from the floor to about 6 inches below your elbow. This will give you the proper table height for your height.
TYPES OF RAISERS
1. FOLD-AWAY TABLE AND PVC PIPE
You can make most any fold-away table ergonomically friendly using PVC pipe. You can buy PVC pipe in the plumbing section of any hardware store. This project uses 1.5 inch PVC pipe.
FIND THE LENGTH TO CUT THE FOUR PVC PIPES
- Measure the original table height, e.g. 38 inches
- Now, measure the table leg from the joint to the floor, e.g. 20 inches
- Subtract the new table height needed from the original table height, e.g. 45" - 38" = 7 inches
- Add measurement B to measurement C, e.g. 20" + 7" = 27 inches
- Cut four PVC pipes 27 inches long.
- Slip the PVC pipes over the table leg as shown in Diagrams 1 & 2.
2. BED RISERS
The next option for raising your table is a bed riser. Bed risers can be purchased online or at a hardware or furniture store. Bed risers range in heights from approximately 3 inches to 8 inches.

3. WOOD SCREW-IN FINIAL
Lastly, if your table legs are wood, you can attach wooden screw-in finals to the bottom of them. Drill a hole into the bottom of the table leg the length of the end screw on the finial. Screw the finial into the leg. You could secure the finial with a little bit of very strong glue for extra support. Finials come in a variety of shapes and lengths.

My favourite foundation piecing papers
Anyone who has done foundation paper piecing (FPP) knows how frustrating and tedious it is when struggling with bad piecing paper. I've tried most every FPP on the market. I've also tried various tissue papers, tracing papers, parchment paper, copy papers, phone book paper ... well, you get the picture. After all my research, my favourite FPPs are Fun-dation and Sulky Tear Away Stabilizer.
Because I do a lot of FPP for my designs, I was excited to see Fun-dation brand piecing paper go on sale recently at Amazon.ca for $5 CDN. I ordered five packages. A package has 25 sheets. I'm glad I ordered when I did because the price went back up to $7.69 CDN (which is still not too bad). Fun-dation brand FPP is the best I've used. It tears away beautifully, it's translucent enough for fabric placement, and it prints well; I love this stuff. One package of Fun-dation works out to about 0.31 cents a sheet.
 |
| Fun-dation Foundation Piecing Paper |
Another very good option for FPP is Sulky Tear-Easy Stabilizer in the 12" x 11 yards roll ($15.11 CDN at Amazon). Sulky Tear-Easy is very much like Fun-dation. An 11-yard roll of Sulky makes [47] 8.5 inch wide sheets at 0.32 cents a sheet.
 |
| Sulky Tear-Easy Stabilizer |
How to Resize Quilt Blocks and Patterns


Quilt patterns can come in many sizes. But what if the size of the pattern isn't the size you want? Maybe you want a throw instead of a mini quilt or a baby quilt instead of a king-size. To resize your pattern or block, you need to know the percentage to reduce or enlarge the pattern templates. Read below to learn three easy ways to get the percentage you need to resize templates.
THREE METHODS FOR RESIZING YOUR QUILTS AND BLOCKS
1. DO THE MATH
Below is the very simple formula to get the percentage for reducing or enlarging.
ENLARGING:
Measure the shortest length of the original block size? e.g. 6 inches
What size do you want the new block to be? e.g. 8 inches
Divide the new size by the original size, e.g. 8 ÷ 6 = 1.33.
Move the decimal point two steps to the right to get your percentage = 133%.
Enter 133% into the copy machine to enlarge your 6-inch block to an 8-inch block.
REDUCING:
Do the opposite of above.
Divide the small size (e.g. 6") by the large size (e.g. 8") to get your reduction
percentage, e.g. 6 ÷ 8 = 0.75 = 75% reduction.

Do the opposite of above.
Divide the small size (e.g. 6") by the large size (e.g. 8") to get your reduction
percentage, e.g. 6 ÷ 8 = 0.75 = 75% reduction.
2. PROPORTIONAL SCALE
Proportional Scales may look a bit intimidating at first but they're easy to use.
You can buy a Proportional Scale for quilters HERE.

How To Use a Proportional Scale
Proportional Scales may look a bit intimidating at first but they're easy to use.
You can buy a Proportional Scale for quilters HERE.

How To Use a Proportional Scale
- On the bottom wheel, find the original size of your block (e.g. 6"), [Fig 1].
- Line up this number with the new size (e.g. 8") on the top wheel, [Fig 1].
- In the window, you'll see the percentage of the reduction or enlargement you need to resize your block, [Fig 2].
Note: The math formula and proportional scale results may be off a tiny bit. This is okay.

Figure 1

Figure 2
3. PROPORTIONAL MEASUREMENT CHART

Figure 1

Figure 2
3. PROPORTIONAL MEASUREMENT CHART
- Download my enlargement and reduction charts to find the percentages you need at a glance. Download PDF
- Find the original measurement on the left side of the chart.
- Go along that row until you get to the measurement you want on the top row.
- The number in the intersecting box is the percentage you'll need to reduce or enlarge your block

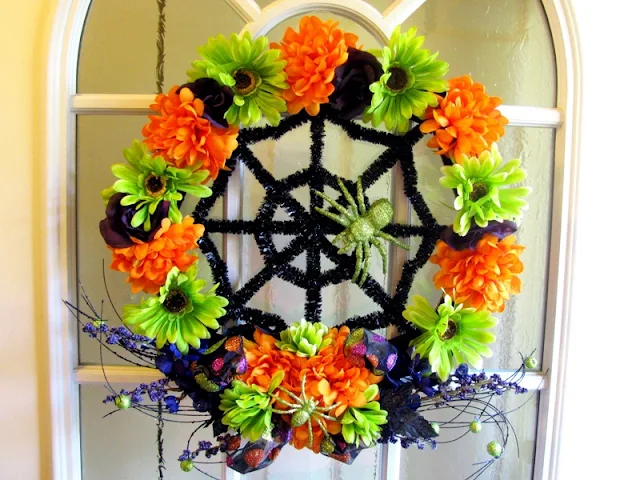
Halloween Decor 2017: Beautiful Halloween wreath
A couple of years ago I posted a Halloween floral arrangement that I made for my home. This year, I made a Halloween wreath for my front door. I turn 60 this October and I love Halloween, so I'm having a birthday/Halloween party for my big day. I wanted a pretty wreath on the door to greet my guests. I saw some beautiful wreaths on Pinterest with skulls and ghoulish stuff, but I wanted a floral wreath. Everything I used to make this wreath is from the dollar store. It cost about $15 to make which proves you don't need a lot of money to pretty up your home for Halloween. Happy Halloween one and all!
Subscribe to:
Posts (Atom)


.jpg)


